Testing of Impact Strength
When metal is subjected to suddenly applied load or stress, it may fail. In order to assess the capacity of metal to stand sudden impacts, the impact test is employed. The impact test measures the energy necessary to fracture a standard notched bar by an impulse load and as such is an indication of the notch toughness of the material under shock loading. Izod test and the Charpy test are commonly performed for determining impact strength of materials.
These methods employ same machine and yield a quantitative value of the energy required to fracture a special V notch shape metal. The most common kinds of impact test use notched specimens loaded as beams. V notch is generally used and it is get machined to standard specifications with a special milling cutter on milling machine in machine shop. The beams may be simply loaded (Charpy test) or loaded as cantilevers (Izod test). The function of the
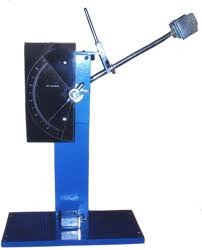
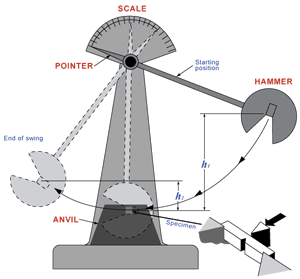
V notch in metal is to ensure that the specimen will break as a result of the impact load to which it is subjected. Without the notch, many alloys would simply bend without breaking, and it would therefore be impossible to determine their ability to absorb energy. It is therefore important to observe that the blow in Charpy test is delivered at a point directly behind the notch and in the Izod test the blow is struck on the same side of the notch towards the end of the cantilever. Fig. shows the impact testing set up arrangement for charpy test. The specimen is held in a rigid vice or support and is struck a blow by a traveling pendulum that fractures or severely deforms the notched specimen. The energy input in this case is a function of the height of fall and the weight of the pendulum used in the test setup. The energy remaining after fracture is determined from the height of rise of the pendulum due to inertia and its weight. The difference between the energy input and the energy remaining represents the energy absorbed by the standard metal specimen. Advance testing setups of carrying out such experiments are generally equipped with scales and pendulumactuated pointers, which provide direct readings of energy absorption. Copied from Introduction to Basic Manufacturing Processes and Workshop Technology by Rajender Singh.



Post Comment
You must be logged in to post a comment.