Description:
In this video, I’ll show you how to experiment with sensors and use them to control an LED based on environmental conditions. Whether it’s light or temperature, you’ll learn how to use a light sensor or temperature sensor to make your LED respond to the surroundings. This project is perfect for beginners looking to add interactivity to their circuits!
What You’ll Need:
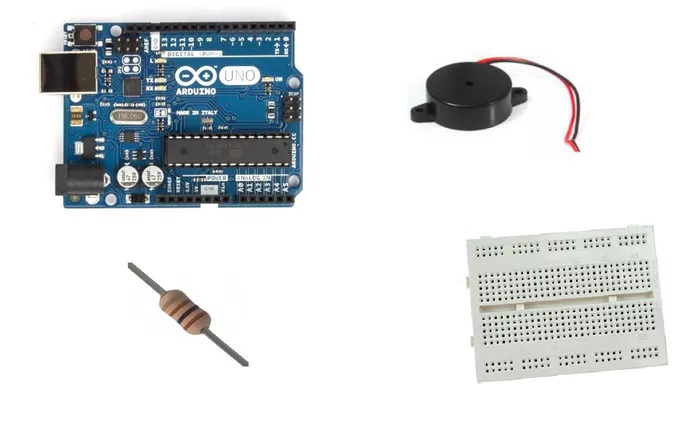
- Arduino board (Arduino Uno, Nano, or any compatible model)
- LED (Light Emitting Diode)
- 220-ohm resistor
- Breadboard
- Jumper wires
- **Light Sensor (LDR – Light Dependent Resistor) or a Temperature Sensor (LM35)
- 10k-ohm resistor for the LDR sensor (if using)
What You’ll Learn:
- How to wire and use a light sensor (LDR) or a temperature sensor (LM35) with an Arduino.
- How to use sensor data to control the state of an LED.
- Basic concepts of analog readings and sensor input on the Arduino.
Option 1: Control LED with Light Sensor (LDR)
In this example, we’ll use a Light Dependent Resistor (LDR) to control an LED. The LDR changes its resistance depending on the light level. When it’s bright, its resistance is low, and when it’s dark, its resistance is high. We will use this change in resistance to turn the LED on or off based on the surrounding light.
The Circuit Diagram (LDR):
- LED:
- Connect the long leg (positive or anode) of the LED to Pin 13 on the Arduino.
- Connect the short leg (negative or cathode) of the LED to GND on the Arduino, through a 220-ohm resistor.
- LDR (Light Dependent Resistor):
- Connect one leg of the LDR to 5V on the Arduino.
- Connect the other leg to A0 (Analog Pin 0) on the Arduino and to a 10k-ohm resistor connected to GND.
Arduino Code for Light Sensor (LDR):
cppCopy code// Define the pin numbers
int ledPin = 13;    // LED connected to pin 13
int ldrPin = A0;    // LDR connected to analog pin A0
int ldrValue = 0;   // Variable to store the LDR value

void setup() {
  pinMode(ledPin, OUTPUT);  // Set LED pin as output
  Serial.begin(9600);       // Start serial communication for debugging
}

void loop() {
  // Read the value from the LDR
  ldrValue = analogRead(ldrPin);

  // Print the LDR value to the Serial Monitor for testing
  Serial.println(ldrValue);

  // If the LDR value is above a certain threshold, turn the LED on
  if (ldrValue > 500) {  // Change this threshold based on your environment
    digitalWrite(ledPin, HIGH);  // Turn on the LED
  } else {
    digitalWrite(ledPin, LOW);   // Turn off the LED
  }

  delay(100);  // Small delay for stability
}
How the Code Works (LDR):
- analogRead(ldrPin): Reads the analog value from the LDR (0 to 1023).
- Threshold value: If the value from the LDR is above a certain threshold (in this case, 500), the LED is turned on; otherwise, it is turned off.
- Serial Monitor: The
Serial.println()helps us monitor the sensor readings in real-time for testing.
Option 2: Control LED with Temperature Sensor (LM35)
Now, let’s use a Temperature Sensor (LM35) to control the LED based on temperature. The LM35 outputs an analog voltage that is proportional to the temperature in Celsius. We can use this to turn on the LED when the temperature exceeds a certain threshold.
The Circuit Diagram (LM35):
- LED:
- Connect the long leg (positive or anode) of the LED to Pin 13 on the Arduino.
- Connect the short leg (negative or cathode) of the LED to GND on the Arduino, through a 220-ohm resistor.
- LM35 Temperature Sensor:
- Connect VCC (power) of the LM35 to 5V on the Arduino.
- Connect GND (ground) of the LM35 to GND on the Arduino.
- Connect the Analog Output pin of the LM35 to A0 (Analog Pin 0) on the Arduino.
Arduino Code for Temperature Sensor (LM35):
cppCopy code// Define the pin numbers
int ledPin = 13;  // LED connected to pin 13
int tempPin = A0; // LM35 connected to analog pin A0
int tempValue = 0; // Variable to store the temperature value
float temperature = 0.0; // Temperature in Celsius

void setup() {
  pinMode(ledPin, OUTPUT);  // Set LED pin as output
  Serial.begin(9600);       // Start serial communication for debugging
}

void loop() {
  // Read the analog value from the LM35
  tempValue = analogRead(tempPin);

  // Convert the analog value to temperature in Celsius
  temperature = (tempValue * 5.0 * 100.0) / 1024.0;  // LM35: 10mV per °C

  // Print the temperature to the Serial Monitor
  Serial.println(temperature);

  // If the temperature exceeds a certain threshold, turn the LED on
  if (temperature > 25.0) {  // Change this threshold based on your needs
    digitalWrite(ledPin, HIGH);  // Turn on the LED
  } else {
    digitalWrite(ledPin, LOW);   // Turn off the LED
  }

  delay(1000);  // Delay for 1 second before reading the sensor again
}
How the Code Works (LM35):
- analogRead(tempPin): Reads the analog value from the LM35.
- Conversion to Temperature: The sensor outputs 10mV per °C. We convert the analog reading into a temperature in Celsius.
- Threshold value: If the temperature exceeds 25°C, the LED will turn on. You can adjust this threshold to suit your needs.
- Serial Monitor: Displays the temperature in real-time to help with testing and debugging.
How to Set Up the Circuit and Upload the Code:
- Wire the Circuit:
- For the LDR (light sensor), connect it as described in Option 1.
- For the LM35 (temperature sensor), connect it as described in Option 2.
- Upload the Code:
- Open the Arduino IDE.
- Paste the provided code into the IDE.
- Select your Arduino board and port under Tools.
- Click Upload to send the code to your Arduino.
- Watch the LED React:
- If using the LDR, the LED will turn on when the light is bright and off when it’s dark.
- If using the LM35, the LED will turn on when the temperature exceeds your threshold (e.g., 25°C).
What You’ve Learned:
- Using sensors with Arduino: You’ve learned how to use a light sensor (LDR) or a temperature sensor (LM35) to read environmental data.
- Controlling an LED with sensor input: You now know how to use analog readings to make decisions and control an LED based on environmental conditions.
- Understanding thresholds: You learned how to set thresholds for controlling the LED based on sensor data.
Next Steps:
- Modify the threshold: Adjust the values in the code to turn the LED on at different light or temperature levels.
- Use multiple sensors: Try adding both a light and temperature sensor to control the LED with multiple conditions.
- Add more components: Experiment with more sensors or actuators, like fans, motors, or buzzers.
Conclusion:
Congratulations! You’ve now experimented with sensors to make your LED react to environmental changes. Whether using light or temperature sensors, you can expand on this project and create even more complex systems with Arduino. Keep experimenting, and you’ll be able to create interactive and responsive electronics projects in no time!


Post Comment
You must be logged in to post a comment.