Description:
In this video, I’ll show you how to make your Arduino project even more exciting by adding multiple LEDs and controlling them in different patterns! This project is perfect for beginners who want to take their skills to the next level. You’ll learn how to wire multiple LEDs to your Arduino and create fun lighting patterns that turn them on and off in sequence.
What You’ll Need:
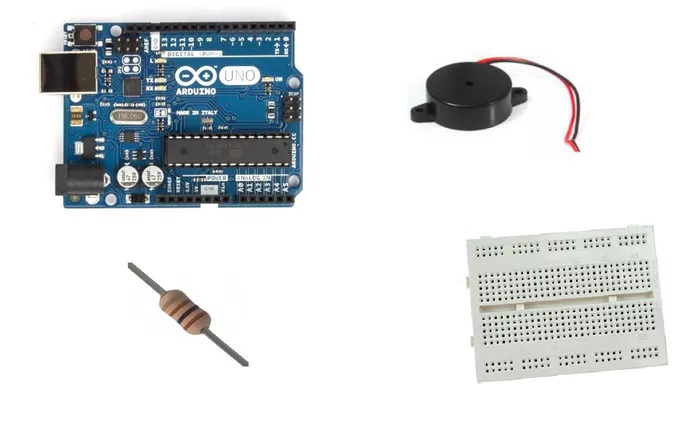
- Arduino board (Arduino Uno, Nano, or any compatible model)
- 3 LEDs (Light Emitting Diodes)
- 3 Resistors (220 ohms each)
- Breadboard
- Jumper wires
What You’ll Learn:
- How to wire multiple LEDs to an Arduino.
- How to control multiple LEDs using code.
- How to create patterns with LEDs (like a running light effect).
- Basic concepts of timing and sequencing with
delay()in Arduino.
The Circuit Diagram:
- LEDs:
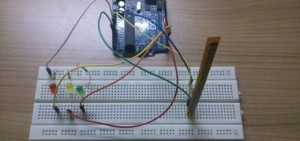
- Connect the long leg (positive or anode) of each LED to Pin 8, Pin 9, and Pin 10 on the Arduino.
- Connect the short leg (negative or cathode) of each LED to GND on the Arduino, through a 220-ohm resistor for each LED.
Circuit Diagram:
scssCopy code [LED1] ---> Pin 8 (Arduino)
    |
   220Ω
    |
 (GND) (Arduino)

 [LED2] ---> Pin 9 (Arduino)
    |
   220Ω
    |
 (GND) (Arduino)

 [LED3] ---> Pin 10 (Arduino)
    |
   220Ω
    |
 (GND) (Arduino)
Arduino Code:
In this code, we’ll make the LEDs light up in sequence (one after the other) to create a simple running light effect. After the last LED turns on, all LEDs will turn off and the sequence will start again.
cppCopy code// Define the pin numbers for the LEDs
int led1 = 8;  // LED 1 connected to Pin 8
int led2 = 9;  // LED 2 connected to Pin 9
int led3 = 10; // LED 3 connected to Pin 10

void setup() {
  // Set the LED pins as OUTPUT
  pinMode(led1, OUTPUT);
  pinMode(led2, OUTPUT);
  pinMode(led3, OUTPUT);
}

void loop() {
  // Turn on LED 1, then wait
  digitalWrite(led1, HIGH);
  delay(500);  // Wait for 500 milliseconds (half a second)
  digitalWrite(led1, LOW);  // Turn off LED 1

  // Turn on LED 2, then wait
  digitalWrite(led2, HIGH);
  delay(500);  // Wait for 500 milliseconds
  digitalWrite(led2, LOW);  // Turn off LED 2

  // Turn on LED 3, then wait
  digitalWrite(led3, HIGH);
  delay(500);  // Wait for 500 milliseconds
  digitalWrite(led3, LOW);  // Turn off LED 3
}
How the Code Works:
- pinMode(): Sets the pins connected to the LEDs as outputs so you can control them.
- digitalWrite(): Turns the LEDs on (HIGH) or off (LOW).
- delay(): Pauses the program for the specified time (in milliseconds). In this case, each LED stays on for 500 milliseconds (0.5 seconds) before turning off and moving to the next one.
In the loop(), the LEDs light up one by one with a 500ms delay, creating a “running light” effect. After LED 3 turns off, the sequence starts again from LED 1.
How to Set Up the Circuit and Upload the Code:
- Wire the Circuit:
- Connect the long leg (anode) of each LED to Pin 8, Pin 9, and Pin 10 on the Arduino.
- Connect the short leg (cathode) of each LED to GND on the Arduino, through a 220-ohm resistor.
- Upload the Code:
- Open the Arduino IDE.
- Paste the provided code into the IDE.
- Select your Arduino board and port from the Tools menu.
- Click Upload to send the code to your Arduino.
- Watch the LEDs Light Up:
- After uploading the code, the LEDs will light up in sequence. The pattern will repeat over and over.
What You’ve Learned:
- Wiring multiple LEDs: You’ve connected three LEDs to your Arduino and controlled them individually.
- Sequencing LEDs: You’ve used
digitalWrite()anddelay()to control multiple LEDs in a sequence. - Timing: The
delay()function allowed you to time the LEDs, creating a fun running light effect.
Next Steps:
Now that you know how to control multiple LEDs, here are some ideas for more advanced projects:
- Speed up the sequence: Try reducing the delay time to make the LEDs light up faster.
- Add more LEDs: Add even more LEDs to the circuit and control them in different patterns.
- Reverse the pattern: Modify the code to make the LEDs light up in reverse order after completing the sequence.
Conclusion:
You’ve just created a fun running light effect with multiple LEDs and your Arduino! You’ve learned how to wire multiple LEDs, write code to control them, and create simple light patterns. The possibilities are endless, and now you’re ready to experiment and add more creative features to your projects!
Happy experimenting, and keep learning with Arduino!



Post Comment
You must be logged in to post a comment.