Arduino Sensor Applications with Flex
[nextpage title=”Introduction” ]
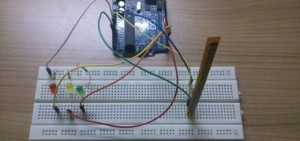
Hello friends we have made in this article with a simple Arduino uno flex (flexibility) sensor will let the oil according to the state of the analog value of the applications received from flex sensor.
Used materials:
- Arduino UNO R3
- 2.2 “Flex Sensor
- 3 LED diodes
- 10K resistance (flex sensor)
- 220 ohm resistor (for LED diodes)
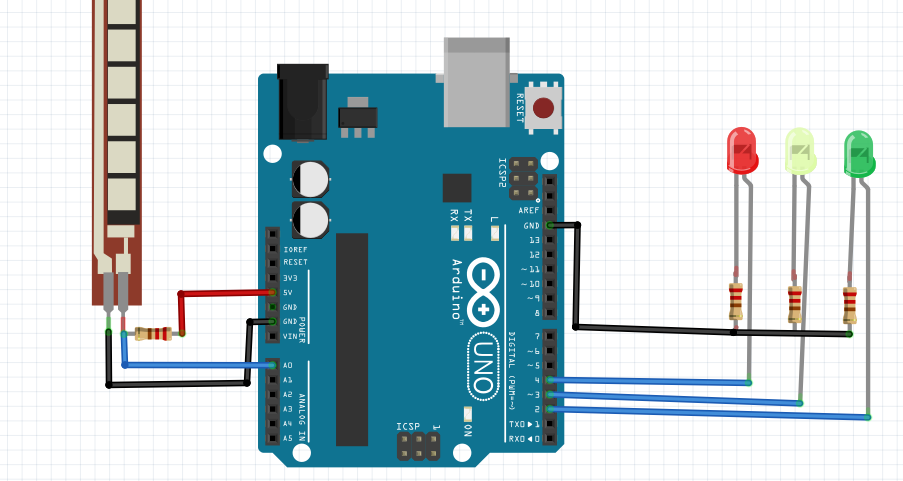
It seems that the circuit diagram in the image below.
[/nextpage]
[nextpage title=”Arduino UNO” ]
Arduino Uno
Technical specs
| Microcontroller | ATmega328P |
| Operating Voltage | 5V |
| Input Voltage (recommended) | 7-12V |
| Input Voltage (limit) | 6-20V |
| Digital I/O Pins | 14 (of which 6 provide PWM output) |
| PWM Digital I/O Pins | 6 |
| Analog Input Pins | 6 |
| DC Current per I/O Pin | 20 mA |
| DC Current for 3.3V Pin | 50 mA |
| Flash Memory | 32 KB (ATmega328P) of which 0.5 KB used by bootloader |
| SRAM | 2 KB (ATmega328P) |
| EEPROM | 1 KB (ATmega328P) |
| Clock Speed | 16 MHz |
| Length | 68.6 mm |
| Width | 53.4 mm |
| Weight | 25 g |
[/nextpage]
[nextpage title=”Flex Sensor” ]
The logic of the flex sensors
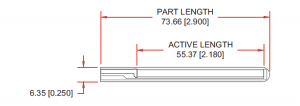
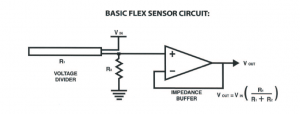
Flexibility sensors are bent sensor .flex in English at the bend or flex (stretch it) when the sensor resistance of the sensor. flex sensor resistance on metal pads is 2.2 in inside fold, outside the fold “and 4.5” sizes of flex sensors as often we can make this sensor in ourselves.
Below is a simple flex sensor circuit is provided.
[/nextpage]
[nextpage title=”Arduino Code” ]
Arduino Code
#define green 2#define red 3#define yellow 4void setup(){pinMode(yellow,OUTPUT);pinMode(green,OUTPUT);pinMode(red,OUTPUT);Serial.begin(9600);}void loop(){int sensor, degrees;sensor = analogRead(0);degrees = map(sensor, 768, 853, 0, 90);Serial.print("analog input: ");Serial.print(sensor,DEC);Serial.print(" degrees: ");Serial.println(degrees,DEC);if(sensor<580){digitalWrite(yellow,LOW);digitalWrite(green,HIGH);digitalWrite(red,LOW);}else if((sensor>580)&&(sensor<650)){digitalWrite(green,LOW);digitalWrite(yellow,HIGH);digitalWrite(red,LOW);}else{digitalWrite(red,HIGH);digitalWrite(green,LOW);digitalWrite(yellow,LOW);}delay(100);}


Post Comment
You must be logged in to post a comment.