Blink an LED using Bluetooth
[nextpage title=”Description” ]Bluetooth is a wireless technology standard for exchanging data over short distances (using short-wavelength UHF radio waves in the ISM band from 2.4 to 2.485 GHz) from fixed and mobile devices, and building personal area networks (PANs). Invented by telecom vendor Ericsson in 1994, it was originally conceived as a wireless alternative to RS-232 data cables. It can connect several devices, overcoming problems of synchronization
This project aims to control an LED via Android Phone using Bluetooth Communication through commonly used module HC-05. For controlling we use an Arduino board with an Atmega8 sitting on it.
HC-05 module is an easy to use Bluetooth SPP (Serial Port Protocol) module, designed for transparent wireless serial connection setup. HC-05 is 6-pin Module. The module has 6 pins labelled on the back, but most modules only have 4 of those populated with pogo pins. KEY & STATE seem to be not required, as KEY is used for flashing the device and STATE simply indicates if the device is awake or not. So that leaves only GND, VCC, TXD, RXD.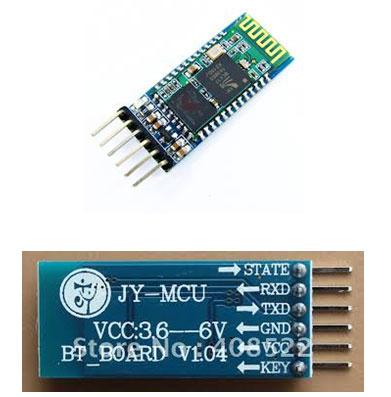
Making Connections with HC-05:
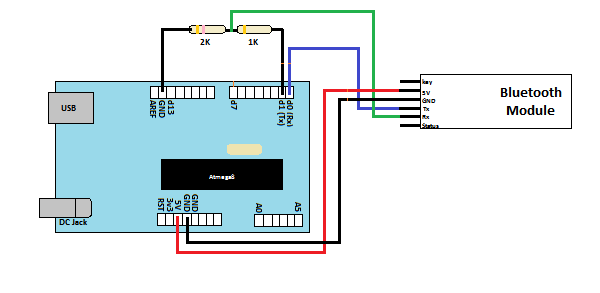
Some modules have VCC labelled for working voltages up to ~6 volts. These modules DO NOT like anything except 3.3 volts on the VCC line. We should use a level converter to 3.3V on the RXD line. Use two resistors, as a simple voltage divider to make the TTL level conversion. One 2.2k ohm resistor to ground, connected to a 1k ohm resistor, to the TXD line on the MCU. Connect the RXD pin in between the two resistors for an output of approx 3.4 volts.
Connect RXD pin of module to TXD of Arduino (Digital Pin 1), through the voltage divider configuration shown below:
Now connect TXD of module to RXD of Arduino (Digital Pin 0).
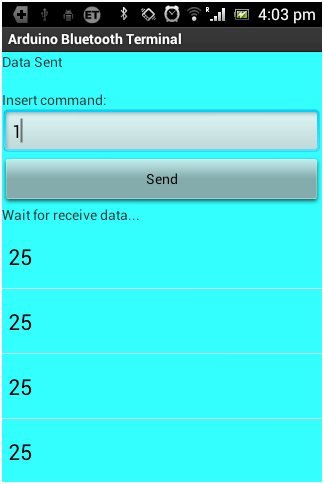
After making above connections, you’ll see blinking led on the module. This just ensures your device is powered properly. After that pick your Android Phone, and get the App- “Arduino Bluetooth Terminal”from the Google Play Store. This app is available for free, and is easy to use.
After installation, turn ON Bluetooth of phone. Now search for devices, until you find HC-05, after getting the same start pairing with it. Enter Password 1234, when asked.
If properly paired, the LED blinking on Bluetooth module will Stop. Congrats..!!! if you reached till here, if not check the connections again. Get back to the App you just downloaded. It’ll automatically find the device, match the key it displays, and start conversation. Make sure, the phone’s Bluetooth remains ON.
Now Let us transfer the code to Arduino, wherein, we try to blink an LED using the Android App.
How Code Works:
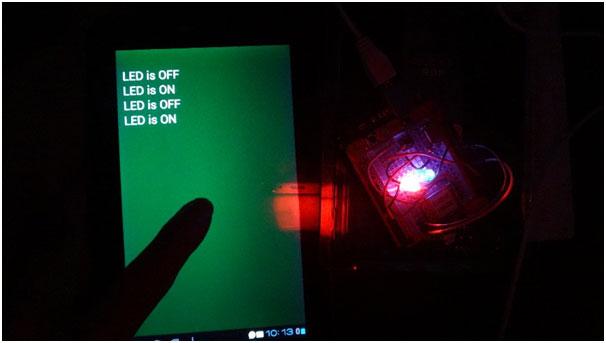
When we send ‘1’ to the Arduino, the LED connected at Pin-7 Turns ON. And when ‘2’ is sent the LED turns OFF. The serial data is read by Arduino, through Serial.read() function and is stored in the integer type variable state declared in the program. After this in the loop(), we just compare state value with 1 or2, and perform respective operation.
[/nextpage][nextpage title=”Circuit Diagram” ]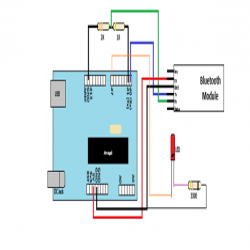
[/nextpage][nextpage title="Code" ]int led = 7;                //led connected at digital Pin 7
int state;
int flag=0;
void setup()
{
    pinMode(led, OUTPUT);                      // LED declared as O/P
    Serial.begin(9600);                        // Baud rate set to 9600bps
}
void loop() {
    if(Serial.available() > 0)
    {
      state = Serial.read();
      flag=0;
   }
    if (state == '1')
    {
       digitalWrite(led1, HIGH);
       if(flag == 0){
       Serial.println("LED is ON");
       flag=1;
    }
    }
    else if (state == '2')
    {
       digitalWrite(led2, HIGH);
       if(flag == 0)
{
       Serial.println("LED is OFF");
       flag=1;
}
}
}           //loop() ends here[/nextpage]




Post Comment
You must be logged in to post a comment.