Arduino Uno and HC-SR04 Distance Measuring Using Lcd
Introduction
One of the first projects are starting to learn the Arduino using HC-SR04 ultrasonic proximity sensor, and 2 × 16 LCD display, to measure the distance of the obstacles facing the robot and it will display on the screen. Here, let’s do this project together. First, let’s talk about the materials we need.
Used materials
- 1 Piece Arduino Uno
- 1 piece HC-SR04 ultrasonic distance sensor
- 1 Piece 16 × 2 LCD Screen
- 1 Piece Breadboard
Enough jumper cables and optional potentiometer. We will use the potentiometer to adjust the brightness of the LCD screen.
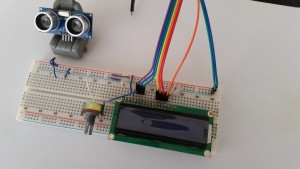
If you want fritzing scheme, let’s create a circuit diagram of looking at the pictures you want.
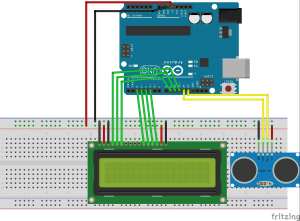
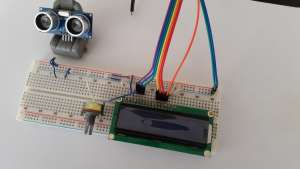
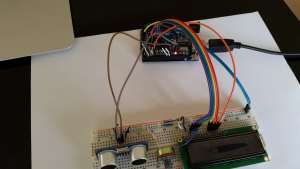
After installing the circuit in this way we are sticking necessary code and open a new code we load our Arduino Arduino project.
/ *
HC-SR04 Ultrasonic Sensor with LCD dispaly
Connections:
HC-SR04 Ultrasonic Sensor
To the Arduino 5V VCC
GND GND to the Arduino
Echo to the Arduino pin 12
Timing to the Arduino pin 13
LCD display (I used to JHD162)
VSS to GND Arduino
To the Arduino 5V VCC
And to the Arduino GND
RS to the Arduino pin 11
R / W to the Arduino pin 10
E to the Arduino pin 9
DB4 to the Arduino pin 2
DB5 to the Arduino pin 3
DB6 to the Arduino pin 4
DB7 to the Arduino pin 5
LED + 5V to the Arduino
LED light to the Arduino GND
Modified by Hedo hardworking (June, 2015).
* /
# Include <liquidcrystal.h> // Load Liquid Crystal Library
Liquidcrystal LCD (11,10,9,2,3,4,5); // Create Object called Liquid Crystal LCD
#define trigp 13 // Echo is connected to the Arduino pin 13 pin Sensor
#define echop 12 is connected to the Arduino // Sensor Trig pin to 12 pin
void setup ()
{
In pinmo (trigp the OUTPUT); // 13. so upfront as output trigp
In pinmo (echop the INPUT); // 12. so as upfront entry echop
Lcd.beg of (16.2); // we say in running the Arduino to lcdy
Lcd.setcurs is (0,0); // cursor We say bring the first column of the first row
LCD. Print (“www.engineersgallery.com”); // we are writing the message to appear on the first line
}
void loop () {
long duration, distance;
digitalwrit to (trigp the LOW);
delaymicroseconds (2);
digitalwrit to (trigp’s, HIGH);
delaymicroseconds (10);
digitalwrit to (trigp the LOW);
The pulse duration = (echop’s, HIGH);
distance = (duration / 2) / 29.1; // before the departure time is measured after the advent of sound measure the flow rate of just dividing by dividing the distance we find the speed of sound.
Lcd.setcurs is (0,1); // cursor to the second line, we bring the first column
LCD. Print (“”); // we print space to clear the screen.
Lcd.setcurs is (0.1), second row from the first column we bring // cursor again
LCD. Print (“Distance”);
Lcd.setcurs is (7,1); // write from the cursor to the beginning of the line 7. We götörüy column
LCD. Print (distance); // we print the measured distance
LCD. Print (“cm”); // we print the unit of measurement
delay (250); // we are holding 250 milliseconds.
}
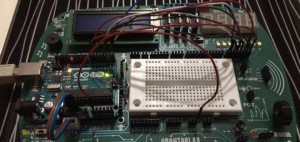
if you do everything right, you have to get a result as follows. If you did not receive your cable connection should check again
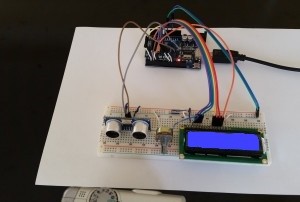 Hc-SR04 is the end of our ultrasonic distance sensors and distance measurement using 16 × 2 LCD screen project



Post Comment
You must be logged in to post a comment.