[quote align=”center” color=”#999999″]ADD_CONTENT_HERE[/quote]
[quote align=”center” color=”#999999″]ADD_CONTENT_HERE[/quote]
[nextpage title=”Introduction” ]
The objective of this tutorial is modeling and programming an outdoor thermometer. To do this we will represent the data measured by a LM35 temperature sensor on a 16 x 2 LCD.
The components that we use will be:
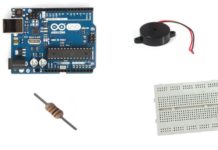
1 x Breadboard
1 x Arduino one (controller)
1 x LM35 temperature Sensor
1 x potentiometer (Variable resistor)
1 x resistor of 220 Ohm
1 x LCD 16 x 2
[/nextpage]
[nextpage title=”Description” ]
To begin our Assembly, we will prepare the Breadboard. First of all We will connect a wire joining our positive pole of the Breadboard with 5V PIN. Then, We will connect the negative of the Breadboard with GND in our controller. Finally, to avoid future problems we will make two bridges in the middle of the board to attach each other positive and negative each other ranks.
Now that we have the Breadboard part will connect the LCD. So the LCD be prepared previously to connect it to a Breadboard.

We will place the LCD with the pins as in the picture setting as much as possible to the right side leaving space for the other components. Then, we will place our potentiometer and our sensormore or less as shown in the image.
[sam_block id=”2″]
We have already placed all components in our breadboard, so we will have to start with the connections.
First step we will connect the contrast of the LCD screen. This part affects to the potentiometer and LCD components. Connecting the left leg of the potentiometer to the positive of the Breadboard (5V) row.
To the right leg we will connect a wire to the negative (GND) Breadboard row. The center leg is that interacts with the LCD. We will connect the central leg with the third PIN of the LCD (starting on the left looking at the sketch).

Now we will connect the temperature sensor. To do so, according to the attached drawing layout, we will connect the left leg of the sensor to the left of the potentiometer. Similarly, we will connect the right leg of the pot to the right leg of the temperature sensor. Both components are connected through the legs of the ends to the negative-positive of the Breadboard respectively. As for the central leg of the temperature sensor connect it to the analogue of our Arduino one A0 PIN since the sensor collects a numeric data.
Finally, we will connect the LCD to our controller. The pins of the LCD 1, 2, 5, 15 and 16 are connected to the Breadboard (from left). The 1, 5 and 16 are connected to the negative of the Breadboard (GND). 2 is connected via a wire to the positive line of the Breadboard (5V). Last 15 is connected through the 220 Ohm resistor to positive row (5V). Pins 4, 6, 11, 12, 13, 14 will be connected to our Arduino in the following way:
[sam_block id=”2″]
4 LCD -> PIN 12
6 LCD -> PIN 11 (PWM)
11 LCD -> PIN 5 (PWM)
12 LCD -> PIN 4
13 LCD -> PIN 3 (PWM)
14 LCD -> PIN 2.
[/nextpage]
[nextpage title=”Program” ]
[sam_block id=”2″]
[message_box title=”Program” color=”red”]
Now is the Software time:
#include <LiquidCrystal.h>
LiquidCrystal lcd(12, 11, 5, 4, 3, 2);
//Here we have declared the library for the LCD and the pins where you will enter the information.
float centi()
{// Function to read an analog valor and converting to digital:
int dato;
float c;
dato=analogRead(A0);
c = (500.0 * dato)/1023;
//This formula leaves the relationship of the sensor with grades. This is easily traceable on the web but we will try to explain it a bit: the LM35 temperature sensor responds to variations of 10 mV per Celsius degree. If the sensor detects 1 degree centigrade to the sensor output 10 mV would be obtained. Example: 26.4 ° C = 264 mV = 0.264 V.We have analog-to-digital converter is 10 bits of resolution, values vary between 0 and 1023, then Vout = (5V * data) / 1023 being (0 < < 1023 data) and to adjust the scale to Celsius: Vout = ((5V*Dato) * 100) / 1023
return (c);
}
float kelvin(float cent)
{
float k;
k=cent+273.15;
return(k);
}
float fahren(float cent)
{
float f;
f=cent*1.8+32;
return (f);
}
float rankin(float cent)
{
float r;
r=(cent + 273.15)*1.8;
return (r);
}
//Here we have declared the functions of conversion of the analog data of sensor input in degrees celsius in their respective equivalents.
void setup() {
// Definimos la LCD con dimension 2×16 y definimos los caracteres que deben salir en las filas:
lcd.begin(16,2);
lcd.print(“C= K=”);
lcd.setCursor(0,1);
lcd.print(“Temperatura”);
}
//Here we have defined what we want that you out of print screen and the size of this.
void loop() {
// put your main code here, to run repeatedly:
float Centigrados = centi();
float Fahrenheit = fahren (Centigrados);
float Rankin = rankin (Centigrados);
float Kelvin = kelvin (Centigrados);
lcd.setCursor(2,0);
lcd.print(Centigrados);
lcd.setCursor(10,0);
lcd.print(Kelvin);
delay(200);
//Finally, we have used the active program or loop part to constantly for each variation you recalculate
the data.
}
[/message_box][/nextpage]
[quote align=”center” color=”#999999″]You can find more Arduino based tutorial by clicking this link [/quote]
[sam_block id=”2″]
[sam_block id=”2″]


