Arduino Projects ideas
Hello Friends. Today I am going to suggest some best arduino projects ideas by which you can create your own arduino project. Here I give some basic brief about it. All time hits Arduino projects
[nextpage title=”1. How to Make a Wireless Keyboard Using Xbee with Arduino” ]
1. How to Make a Wireless Keyboard Using Xbee with Arduino
Brief Intro :
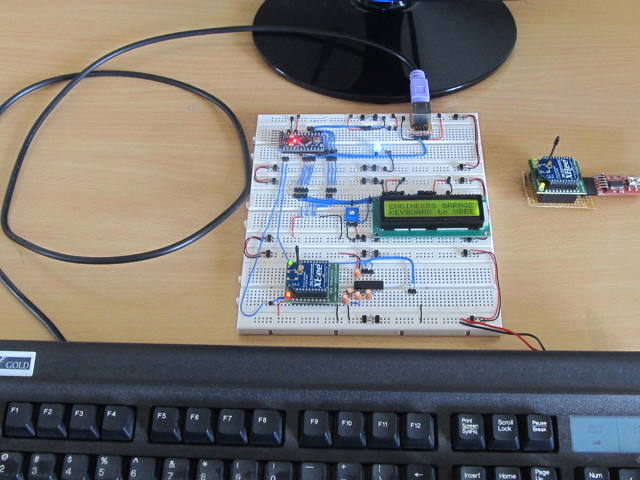
This is the first arduino projects ideas in this post.
The mouse and the Keyboard form the standard input unit for a Personal computer. The QWERT keyboard which is used in the PC comes with a PS2 connector or USB port connector. The PS2 keyboard uses a simple synchronous serial protocol using only two wires for communication. Due to its simplicity the PS2 keyboards are widely used with simple microcontroller based boards also. The PS2 keyboard always acts as a slave device which can send the equivalent ASCII value of the key which has been pressed to its master device which can be a PC or a microcontroller.
To read Mode Click Here
[/nextpage]
[nextpage title=”2. Arduino Based Voltmeter” ]
2. Arduino Based Voltmeter
This is the second arduino projects ideas in this post.
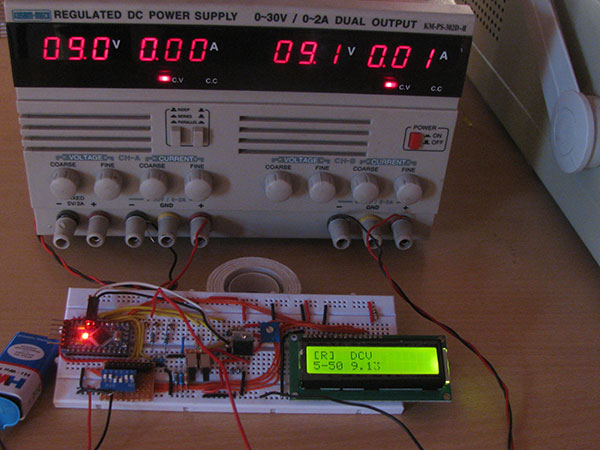
This is a project based on Arduino board which can measure the unknown AC and DC voltages. When we connect the unknown voltage on the breadboard circuit, the 16*2 LCD displays the voltage value. The project uses an Arduino pro mini board whose ADC feature is used along with the concept of Voltage Divider circuit to develop this Voltmeter.
To read more Click Here
[/nextpage]
[nextpage title=”3.CNC Plotter : Arduino CNC” ]
3.CNC Plotter : Arduino CNC
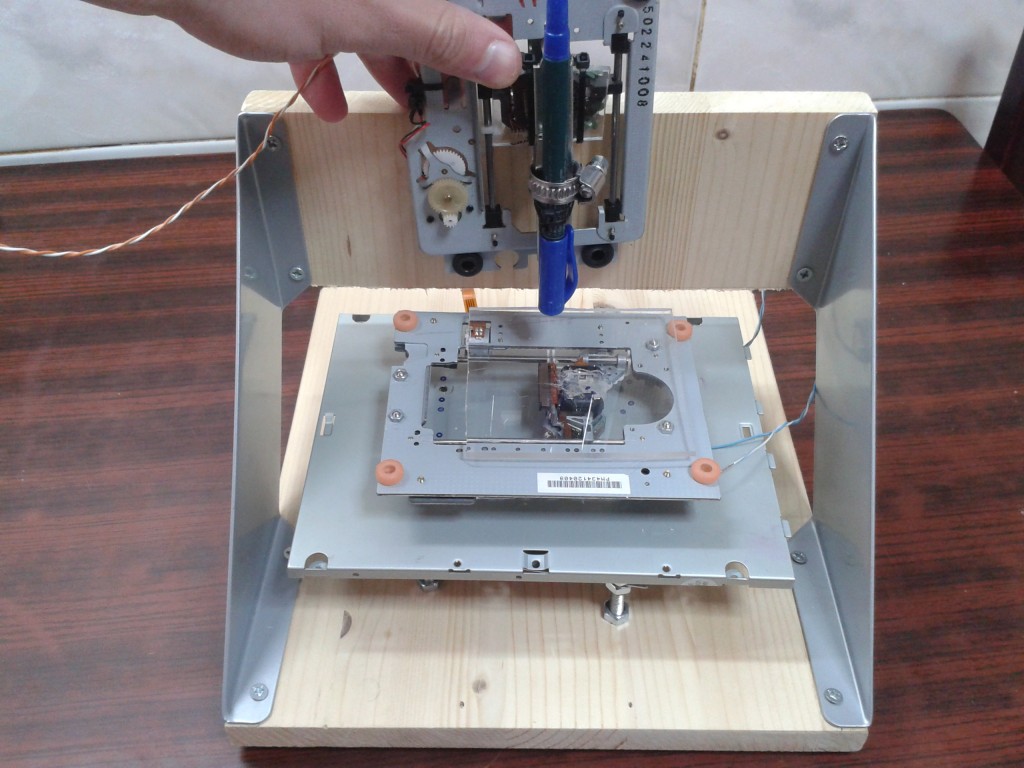
This is the third arduino projects ideas in this post.
This is all about a machine that can draw images which we have loaded before in the software that controlling the motors. The device consists of two bipolar stepper motors- coming from used CD/DVD drives- that directing the canvas to X and Y axis, a mechanism (my own inspiration) fitted with micro servo to move the pen up and down and finally thewooden frame.
To drive the stepper motors i tried mosfets and l293d ic. I prefer the second (l293d) although I noticed that they have more heat at 12v.
To read more Click Here
[/nextpage]
[nextpage title=”4.Robot Guitar – bringing unseen data sources into the real world” ]
4.Robot Guitar – bringing unseen data sources into the real world
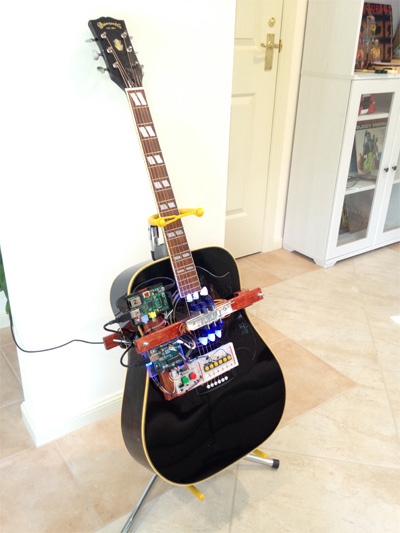
This is the fourth arduino projects ideas in this post.
That robot was really really cool. Even if it is true that a human creator put together the hardware and software in the right order to make it work. But it got me thinking. Was the robot just a tool, I wondered, like a simple guitar plectrum that a human has created and simply told what to do? Was it more than this, was it less than this? I was a teenager in 1988 and with the certainty of a teenager, I resolved then and there that both human AND robot guitar players were cool in subtle and perhaps not-so-subtle ways and yes, I promised myself that I’d have a go at building something like this one day.
As I learnt the guitar slowly over the years I often thought of this robot and wondered how it must compare to the infinitesimally more complex and unknown nuances that humans possess & invest into making music. Surely it would never come close to playing music with the unconscious & sometimes random, very human ‘things’ that we do. Spontaneous things, actions such as muting certain strings a tiny bit, or bending strings ever so slightly, or selectively just going full whack at it like my guitar hero Billy Bragg does. Maybe it’s all those little imperfections, the finger squeaks and educated mistakes that make an interesting piece of music – the mistakes that only a human can make properly.
To read more Click here
[/nextpage]
[nextpage title=”5.SWARM ROBOTS” ]
5.SWARM ROBOTS

This is the fifth arduino projects ideas in this post.
Swarm robots is a new approach to the coordination of multirobot systems which consist of large numbers of mostly simple physical robots. It is supposed that a desired collective behavior emerges from the interactions between the robots and interactions of robots with the environment. This approach emerged on the field of artificial swarm intelligence, as well as the biological studies of insects, ants and other fields in nature, where swarm behaviour occurs.
PROBLEM STATEMENT
Our initial aim is to design 4 autonomous robots which can march past through a particular path,during marching they will remember this path and then they will replicate this path.After completing this problem statement, we aim to extend this marching through any arbitiary path.
[/nextpage]
[nextpage title=”6. NAMASTE ROBOT WITH VOICE : Arduino” ]
6. NAMASTE ROBOT WITH VOICE : Arduino
 This is the sixth arduino projects ideas in this post.
One of our follower send us His work in Arduino. He made One robo which welcomes guest in traditional Indian way.
Here is the detail which he sent us.
Introduction:
This project introduces a model based approach for human recognition and reception by designing simple robot that can scan the obstacles that are observed in its vicinity and wish them politely.
This robot finds application in offices, malls, parks and functions where it can attract people. The robot rotates its head at an angle of 0̊ to 180˚ and scans obstacles and if it scans any people/obstacle that appears within its range, then it wishes “Namaste”with hand movemnets – which is an Indian traditional method of wishing people.
This project provides the design of a simple low cost service robot which acts as a good welcoming host.
[/nextpage]
[nextpage title=”7. Robotic Arm : Arduino” ]
7. Robotic Arm : Arduino
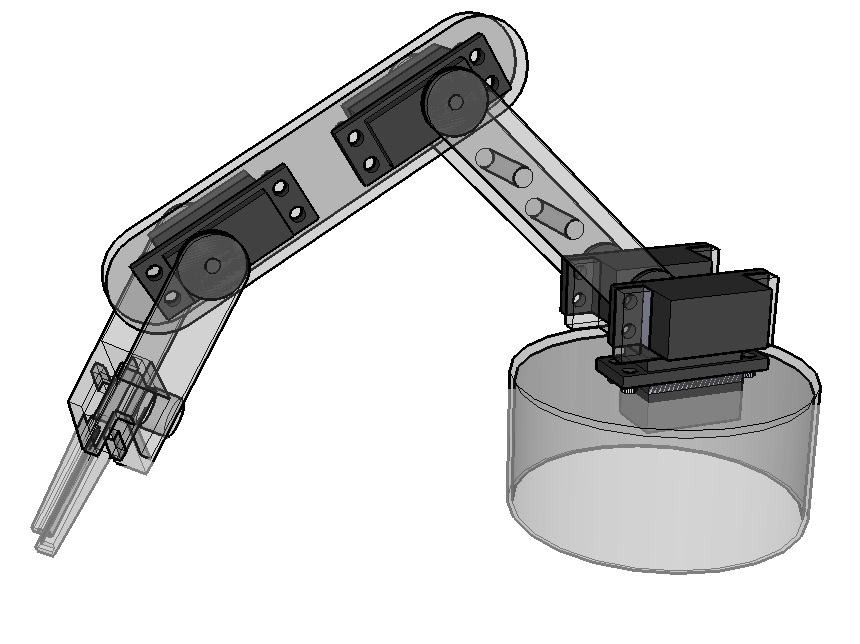
I have constructed a basic Arduino robot arm using 3 servos to build and it’s very simple that I think anyone can replicate and build this. I already had the Arduino Duemilanove ATMEGA328, some foamboard, tools and glue. The robot arm has 3 joints and moves in the X and Y dimensions – not the Z (although I will build this in subsequent versions). I’ve included some very basic Arduino robot arm code along with robot arm design / blueprints and measurements for you to download and build (on any material).
So firstly, I had a look around for robot arm kits that could be brought rather than fabricating the parts myself – I found the prices to be extremely prohibitive. Then I looked at getting a design fabricated but most of the designs I’ve seen rarely give you or decent assembly instructions. I also looked at servo brackets and constructor sets but again whilst the odd piece is OK trying to get the parts for a robot arm is too expensive. to read more
[/nextpage]
[nextpage title=”8. Simple motion tracking with PIR sensors” ]
8. Simple motion tracking with PIR sensors
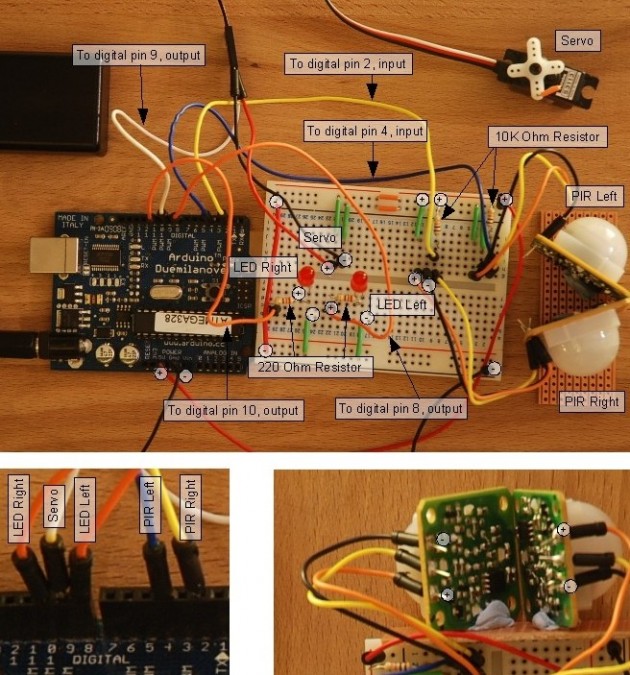
In This Project I used 2 PIR infrared sensors with an Arduino tosense motion either on the left or on the right side. The result will trigger an LED to represent each PIR sensor. I also added PIR in a servo to be controlled. Therefore it turns left when triggered by the left sensor and so on.
2x 220 Ohm resistor (Red, Red, Brown, Gold)
2.0x 10K Ohm resistor (Brown, Black, Orange, Gold)
2x PIR sensor
1x Servo (has to need no more than 5v supply)
3x LED
Arduino Deumilanove w/ ATMEGA328
Breadboard / Prototyping board
Jumper/ Connector wires
Optional 9V DC power supply or use the USB power for the Arduino
You will also need a soldering iron and solder if you use the same PIR as myself.
Some sort of temporary adhesive to hold the sensors in place.
[/nextpage]
[nextpage title=”8.
Arduino and Touchpad Tic Tac Toe using arduino
” ]
9. Arduino and Touchpad Tic Tac Toe using arduino
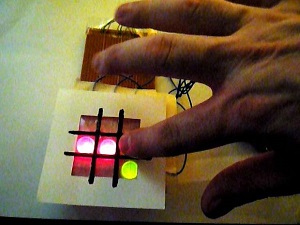
This is an implementation of a tic tac toe game using a 3×3 array of bicoloured LEDs for a display, a simple resistive touchpad, and an Arduino to tie everything together.
Parts and consumables
One perf board (or strip board)
Nine bicoloured LEDs, common cathode
Nine identical resistors, in the 100-220 ohm range
Six identical resistors, in the 10kohm – 500kohm range
One single pole, double throw switch
A bunch of header pins
A bunch of electrical wire
One small square sheet of transparent acrylic, ~ 1 mm thick, 8 cm on the side
Clear sticky tape
[/nextpage]
Thanks for reading these best arduino project ideas page. Please follow us. You can find more arduino project ideas or arduino project on our project box page.

