What should the Grow Box do?
The Grow Box have many tasks.
Automatic watering
It shall ensure that the earth constantly keeps perfect moisture. It can also be adjusted so if I’m planting other plants that need drier or wetter soil.
Humidity and temperature
To ensure that the plants have a good environment, it is important to have the right temperature. Since I use a DHT11 that have both humidity and temperature sensor inside it is also possibility to monitor humidity.
Automatic lighting
As everyone know, plants need light.(most of them) Therefore, I have used LED light to simulate daylight. I’m not sure that this will work the same in practice as in theory. I know that I could have use red and blue light to boost the plant growth, but didn’t think it looked just as nice. These lights are controlled by a timer that will activate the light at 06:30 to 22:30 on Mon-Fri and 10:00 to 23:00 on Sat-Sun. (Sorry no AM/PM)
RGB
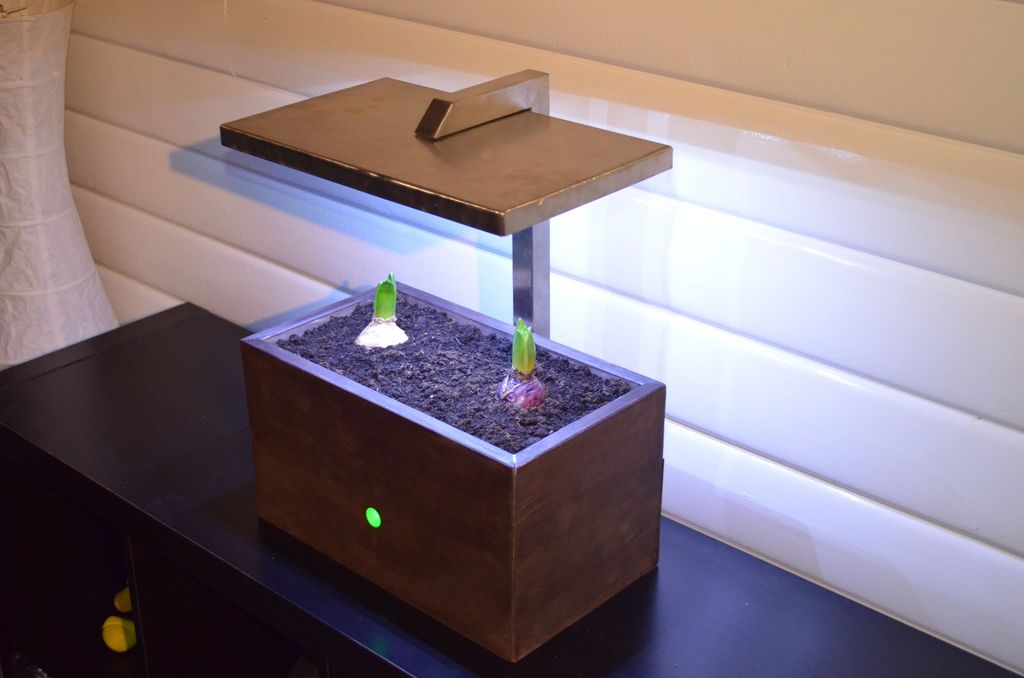
RGB led that is mounted in front of the box is an important part to monitor the plants and the box. I will set up a code that light the RGB when something is wrong or everything is OK.
Green light – Empty water tank
Red light – Too hot
Blue light – Too cold
White light – Everything OK
Here is it possible to add more codes and the RGB has many color left for use. It is possible that i’m also going to add a color for air humidity as well.
Before I start I want to say that i neither am a carpenter, welder, electrician, programmer or gardener. Everything is self-taught and I can therefore understand that others have easier and better solutions. I’m also Norwegian, so my English may not be the best. Hope you understand.
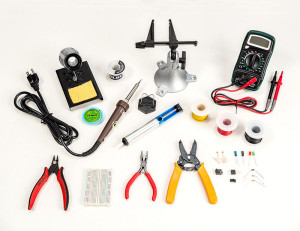
Step 1: Parts and Tools
Parts :
- 2x DC to DC converter 1,5A
- 1x DC to DC converter 5A
- 1x Timer
- 1x Arduino UNO
- 1x DHT11
- 6x 1w LED
- 3x TIP120 transistor
- 2x 5v Relay
- 2x Red LED
- 1x 12v pump
- 1x Water level switch
- 1x Plastic bucket
- 1x Prototype PCB
- 3x Diodes
- 1x 12v 2A Power Supply
- 1x ESP8266
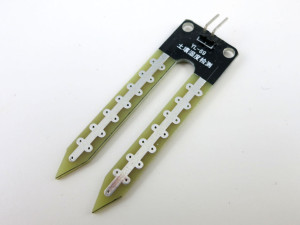
- 1x Soil Moisture Sensor
- 20x Wire to Board terminals
- 1x Potentionmeter
- 2x M8 Steel Washer and Nut
- 150mm Threaded Steel M8
- 1m 6mm Hose
- 2m Hobby Plate 170mm x 12mm
- 1m Wood Trim 12mm x 12mm
- 1m Square Steel 30mm x 30mm
- 1,5m Steel Trim 20mm x 3mm
- Metal plate 400m x 240mm x 3mm
- Some Paint
- Sanding Paper
- Heatsink Pasta
- Some female and male PCB headers
- Resistor set
- Screws
- Solder Tin
- Different wires 20, 18 and 16 AWG
- Soil
- Plastic
- Plants
- Seed
Tools:
- Solder Iron
- Super Glue
- Wood Glue
- Hot Glue
- Dremel
- Drill
- TIG
- Grinder
- Miter Saw
- Screwdrivers
- PC with Arduino IDE
- Multimeter
Step 2: Making the box
In this step we will do some simple woodworking.
For this case, I just used an old hobby plate that I had lying around.
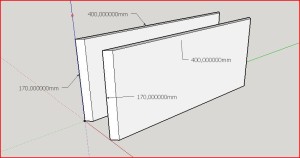
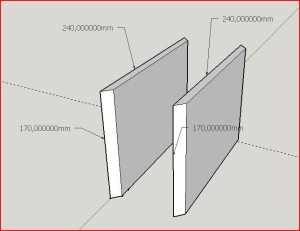
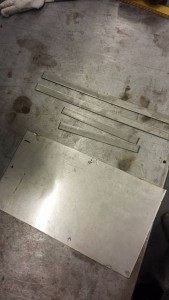
The first thing I did was to cut plates on 2 lengths of 40cm, with 45 degree angles at the ends. This will be the back and front plate. After this I cut 2 plates of 24cm. There I also made a 45-degree angle on the ends. This will be side plates. When you put together these plates it becomes a box.
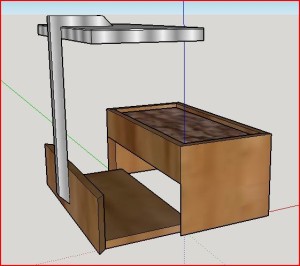
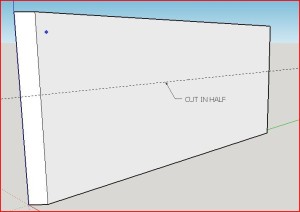
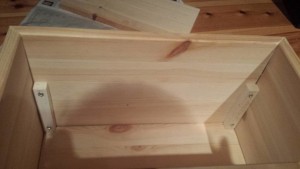
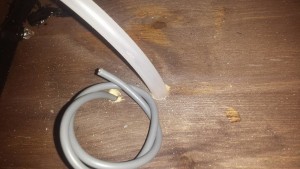
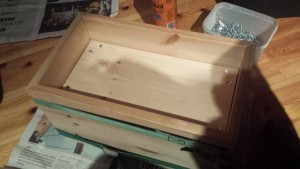
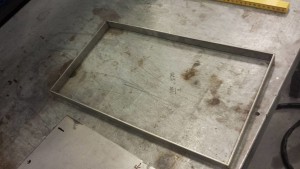
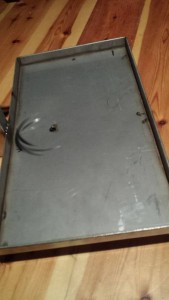
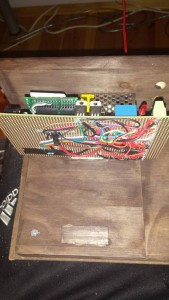
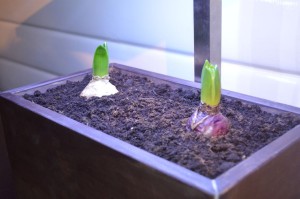
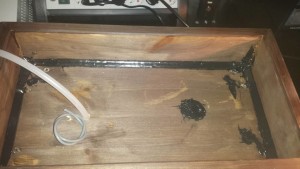
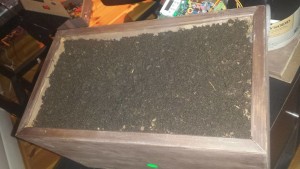
Then i made a bottom plate that fits within the box and a middle plate that will be separate the soil from the electronics. As you can see in picture No. 4, I cut in half the back plate. The reason you see in picture No.1 where I use one part of the back plate and the bottom plate to make a tray.
To assemble the box I used wood glue and screws. I used some small woodtrim that I glued in the corners of the box. This made it easier to screw together the box. I also glued and screwed the middleplate.
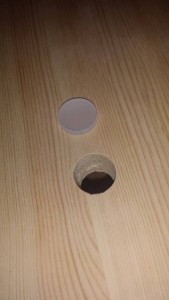
The last thing before painting was to drill some holes.
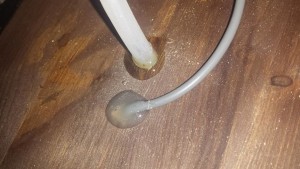
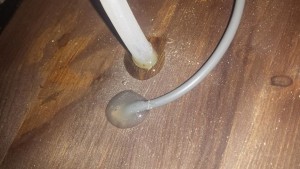
Two holes in the middleplate, one where the hose comes through and one where the cable to the moisture sensor is coming through.
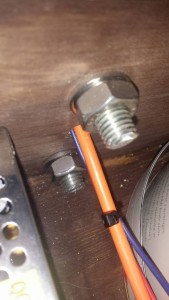
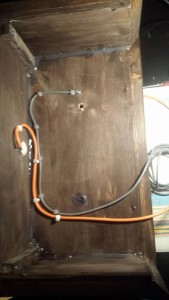
Three holes in the back plate on the lower part, two to assemble the steel structure to the box and one between them so the cables have a way to get inside the squere steel, to the top for lighting and humidity sensor
And one hole in the front.,where the sanded plexiglas and RGB led will be placed.
As paint i used som dark brown stain. Be sure to remove all wood glue on the plates and the corners before paintng. If not the painting will not stick there.
See pictures or ask me for more help.
Step 3: Steel Construction
In this step we will look at the steel frame I made.
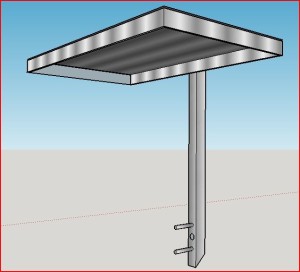
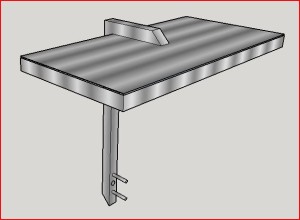
It will be as a roof over the box. It shall have the LED light, humidity and temperature sensor under the top. To create this I cut a plate about 24cm x 40cm and 3mm thick. Around the plate I made a frame that are 2cm wide to avoid the light to spread into the room and it also hides the electronics attached under the plate.
Then I made the stand that will hold up plate and frame. It is made of 3cm square steel. There are two lengths of 45 and 15 cm which are welded together with a 90 degree angle. Then I welded down the short lenght on top of the plate. It’s a little hard to explain, but if you look at the pictures, I hope you understand.
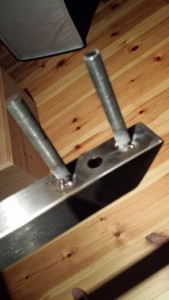
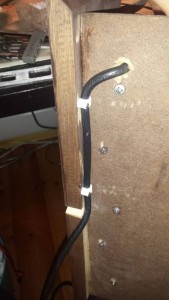
I wanted to use square steel as a cable channel. Therefore I drilled one hole in the plate through the square steel. I also drilled a hole in the end where the cables go into the cabel channel from the box. For assemble the steel structure to the box I welded on two 4cm long M8 threaded steel.
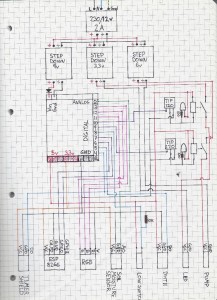
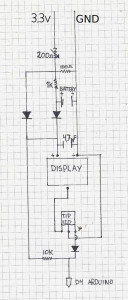
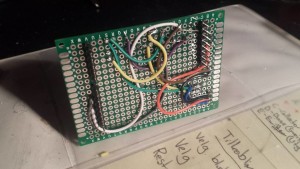
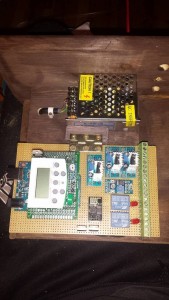
Here I have attached the circuit diagram. Do not bother you about the fly that joined the scan. Out from the PCB I made, I have used wire to PCB connections. I’ll try to explain a bit about each component in this step.
Step Down
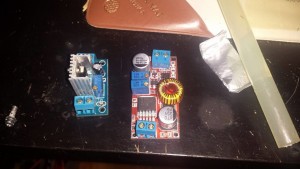
I spent three stepdown converters. Two LM317 to power the Arduino and the pump. They have max amp at 1.5A. I first tried LM317 to drive the LED as well, but had trouble with the voltage regulator going to hot. For the LED I used an other DC to DC converter instead, that can give up to 5A.
Power Supply
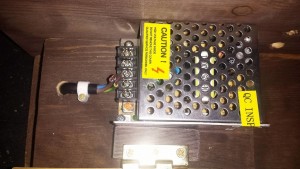
To power the whole project I just used an 12v 2A power supply.
RGB
The RGB is just coming from the Arduino pins.
LED
To wire the LED’s I took the wire through the square steel and up to the plate. I used six pcs 1w LED. I really do not believe it has great significance for the plants but thought it looked nice with light down onto the plants. LED’s are controlled by an Arduino output through a TIP120 and a relay. The power comes from the DC to DC converter. The Arduino output is coded so the output from the ” homemade ” timer activates the LED. Se more about the timer in next step.
Moisture
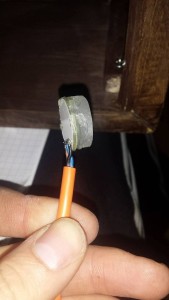
For measurement of moisture in the soil, I used a moisture sensor bought from ebay. It also has a sensor board so we get a more stable analog signal. Two wires going from the sensor board to the moisture sensor. From sensor board to Arduino runs the 3 wires one to A0, one for ground and one to 3.3V. At the start of the project I drilled a hole through the middle plate. The cable for the moisture sensor is going trought there. Hot glued the hole afterwards so it gets tight. The moisturesensor is placed inside the soil when it is in place.
Humidity and Temperature
To monitor humidity and temperatur I used a DHT11. Where i have used double sided tape and attached the sesnor to the top of the plate where the lights are. I was afraid that maybe the lights would affect the temperature when the sensor was so close. But it did not. The sonsor i connected to digital input, 3,3V and ground. The cable to the DHT11 also goes trough the square sttel, such as the wires to LED’s.
Pump
The pump i use is a very simple and small aqvariumpump. It runs on 12v. The pump stands on the bottom of the tank and is secured with hot glue. It is powered by one of the DC to DC converters (stepdowns). From there it goes trough the relay that is controlled from the Arduino trough a TIP120. Although this is a 12v pump I schose to rubn it on 6v so the pressure doesn’t get to high.
Level Switch
To keep track of whether the tank is empty or not, I used a simple levelswitch. It is glued on top of the pump and it is activated early enough so the pump can not pump air. The levelswitch simply just work as a switch and is connected from 5v to a digital input. To make sure we get the right signal i use a pulldown resistor. I used 10k.
ESP 8266
The WiFi module that I have added is intended to upgrade the box later on. I will try to get it as an IoT. But as I’ve wiried it now it works as a warning system when outputs from the Arduino is activated. For example, empty tank or too hot. As software I have used the Blynk app in previous project. But now have problem with the Blynk app does not work on my Andrioid phone anymore. Thing its just an update. For wiring simply follow the wiring diagram. I will come back to ESP8266 when I get the app up working. Remember to set SH_PD high. It is not drawn such in the wiring diagram.
Step 5: Timer
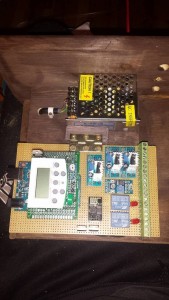
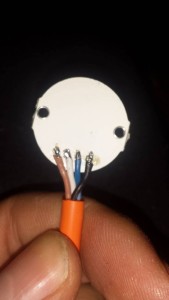
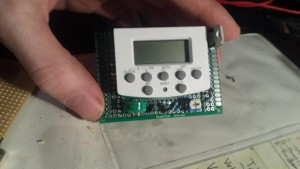
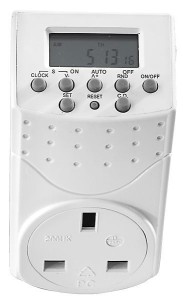
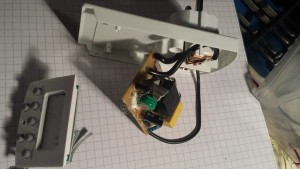
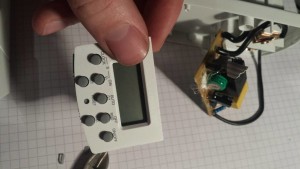
The timer function in the project I was going to code, but after a while i understood that it was very difficult without an additional module. For example, the DS3231SN, Real Time Clock for Arduino But I did’t have any when I started my project so I looked for other solutions. The solution was to go to a hardware store and buy a timer for house outlet. Like the one in the picture. So began the project to find a signal in the timer I could use on a input to Arduino. And after some disassembly and testing I found it. Then I drew a diagram of the timer and made an Arduino shield since I began to run out of space. See the wiring diagram to understand how the timer works.
Step 6: Arduino Code
/*
 * DIY GROW BOX
 * v1.0
 * Made by Peder Ward
 */


 #include <dht.h>

 dht DHT;

 int DHT11_PIN = 5;
 int red = 11;
 int green = 12;
 int blue = 13;
 int mostureSensor = 0;

 const int ledPin = 10;
 const int lsPin = 8;
 const int pumpPin = 9;
 const int timerPin = 4;

 int timerState = 0;
 int lsState = 0;


 //////////////////////

 void setup() {

 Serial.begin(9600);

 // OUTPUTS

 pinMode(red, OUTPUT);
 pinMode(green, OUTPUT);
 pinMode(blue, OUTPUT);
 pinMode(ledPin, OUTPUT);
 pinMode(pumpPin, OUTPUT);

 // INPUTS
 pinMode(timerPin, INPUT);   // INPUT for timer signal
 pinMode(lsPin, INPUT);       // INPUT for  i tank
 }

 void loop() {

 int sensorValue = analogRead(mostureSensor);
 lsState = digitalRead(lsPin);
 timerState = digitalRead(timerPin);

 //Seriel print Moisture verdi

 Serial.println("Moisturevalue ");
 Serial.println(sensorValue);

 //Seriel print Lavtank verdi

 Serial.println ("LsState");
 Serial.println(lsState);

 //Seriel print time

 Serial.println ("TimerState ");
 Serial.println(timerState);

 {
 int chk = DHT.read11(DHT11_PIN);
 switch (chk)
 Serial.print ("HUMI ");
 Serial.print(DHT.humidity, 1);
 Serial.print(",\t");
 Serial.print ("TEMP ");
 Serial.println (DHT.temperature, 1);
 }


 if (sensorValue >= 500 && sensorValue <= 600 && lsState == HIGH)
 {
 digitalWrite(pumpPin, HIGH);
 }
 delay(3000);
 {
 digitalWrite(pumpPin, LOW);
 }
 if (lsState == LOW)
 {
 digitalWrite(pumpPin, LOW);
 }


 if (DHT.temperature <= 19 && lsState == HIGH)
 {
 digitalWrite(blue, HIGH);
 digitalWrite(green, HIGH);
 }
 else
 {
 digitalWrite(blue, LOW);
 digitalWrite(green, LOW);
 }
 if (DHT.temperature >= 26 && lsState == HIGH)
 {
 digitalWrite(red,HIGH);
 }
 else
{
 digitalWrite(red,LOW);
 }


 if (lsState == LOW)
 {
 digitalWrite(green, HIGH);
 }

 if (lsState == HIGH)
 {
 digitalWrite(green, LOW);
 }


 if (timerState == LOW)
{
 digitalWrite (ledPin, HIGH);
 }
 else
 {
 digitalWrite (ledPin, LOW);
 }

 // Her er programmet som skal vise alt ok lys

 if (DHT.temperature <= 26 && DHT.temperature >= 19 && lsState == HIGH)
 {
 if (lsState == HIGH)     // Vet ikke hvorfor jeg måtte ha denne statmanten, men fant ut at jeg måtte det eller flashet bare grønn RBG
 {
 digitalWrite(red,HIGH);
 digitalWrite(blue,HIGH);
 digitalWrite(green,HIGH);
 }
 else
 {
 digitalWrite(red,LOW);
 digitalWrite(blue,LOW);
 digitalWrite(green,LOW);
 }
 }
    delay(1000);
 }
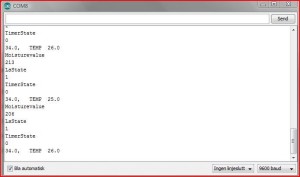
In this step I put the program to the grow box. I also made the code so that I got the opportunity to open the serial monitor and look at different values. This made it easier to troubleshoot when I started programming. See the picture.
As I said at the start of this project, I do not have much experience in programming, so I can understand that others have better solutions. The comments are on Norwegian in the program.
Step 7: Planting
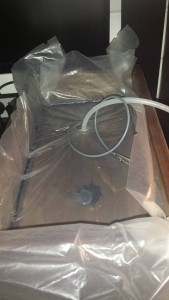
Then the planting. First thing I did was to the space between the middle plate and the walls, then between the hose and the cable and the middle plate with some silicone. After that I got hold of thick plastic that I cut and stapled it to the walls. See pictures. Before I had some soil in the box I made holes several places on the hose and cut it to right length.
Then I filled the soil halfway full before I lay the hose over and placed the moisture sensor between the soil. When everything was in place it was just the planting that remained. Since this is a bit wrong season to plant on it was hard to find seeds in the store. Therefore I bought two Hyacinth and planted. Also had some lettuce seeds laying around that I planted between them. They haven’t grown up up yet.
Step 8: The Result