Testing of Hardness
It is a very important property of the metals and has a wide variety of meanings. It embraces many different properties such as resistance to wear, scratching, deformation and machinability etc. It also means the ability of a metal to cut another metal. The hardness of a metal may be determined by the following tests.
(a) Brinell hardness test
• J.A. Brinell introduced the first standardised indentation-hardness test in 1900. The Brinell hardness test consists in indenting the metal surface with a 10-mm diameter steel ball at a load range of 500-3000 kg, depending of hardness of particular materials.
• The load is applied for a standard time (~30 s), and the diameter of the indentation is measured. giving an average value of two readings of the diameter of the indentation at right angle.
• The Brinell hardness number (BHN or HB ) is expressed as the load P divided by surface area of the indentation.
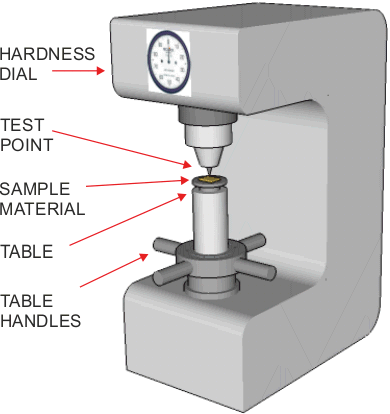
(b) Rockwell hardness test
• The most widely used hardness test in the US and generally accepted due to
1) Its speed
2) Freedom from personal error
3) Ability to distinguish small hardness difference
4) Small size of indentation.
• The hardness is measured according to the depth of indentation, under a constant load.
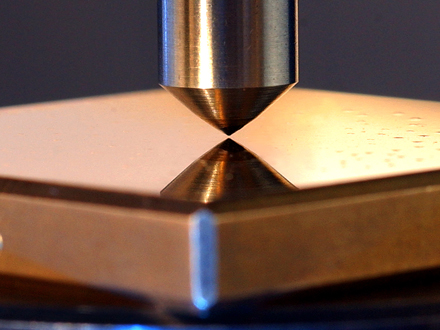
(c) Vickers hardness (also called Diamond Pyramid) test
• Vickers hardness test uses the loads ranging from 1-120 kgf, applied for between 10 and 15 seconds.
• Provide a fairly wide acceptance for research work because it provides a continuous scale of hardness, for a given load.
• VHN = 5-1,500 can be obtained at the same load level easy for comparison).
(d) Meyer Hardness
• Meyer suggested that hardness should be expressed in terms of the mean pressure between the surface of the indenter and the indentation, which is equal to the load divided by the projected area of the indentation.

